Sunday, July 7, 2013

Weekend of Upholstery!

Recently, The Amazing Debbie was in town visiting! She comes into town every 6 months or so and turns my apartment upside down (in a good way though)! She helps me look at things differently and tackle projects I wouldn't normally be able to.  
So there we were with this chair... I got it for $10 at my work's bi-annual yard sale/thrift shop and was so excited to have snagged it for that amount!!!  It is a solid wood Statesville Chair Co. chair that had some pretty truly vintage fabric.  The chair is in great condition, and really the fabric was in great condition as well.  While there was nothing wrong with the fabric quality-wise, there was a problem aesthetically... while I appreciate the vintage value of the velvet green and gold brocade fabric, it just wasn't quite the look I was going for. I did, however, really like the "bones" of the chair - the little scroll work, the wood details, and everything was in good condition, especially for redoing.
  
So here are pictures of the chair before.


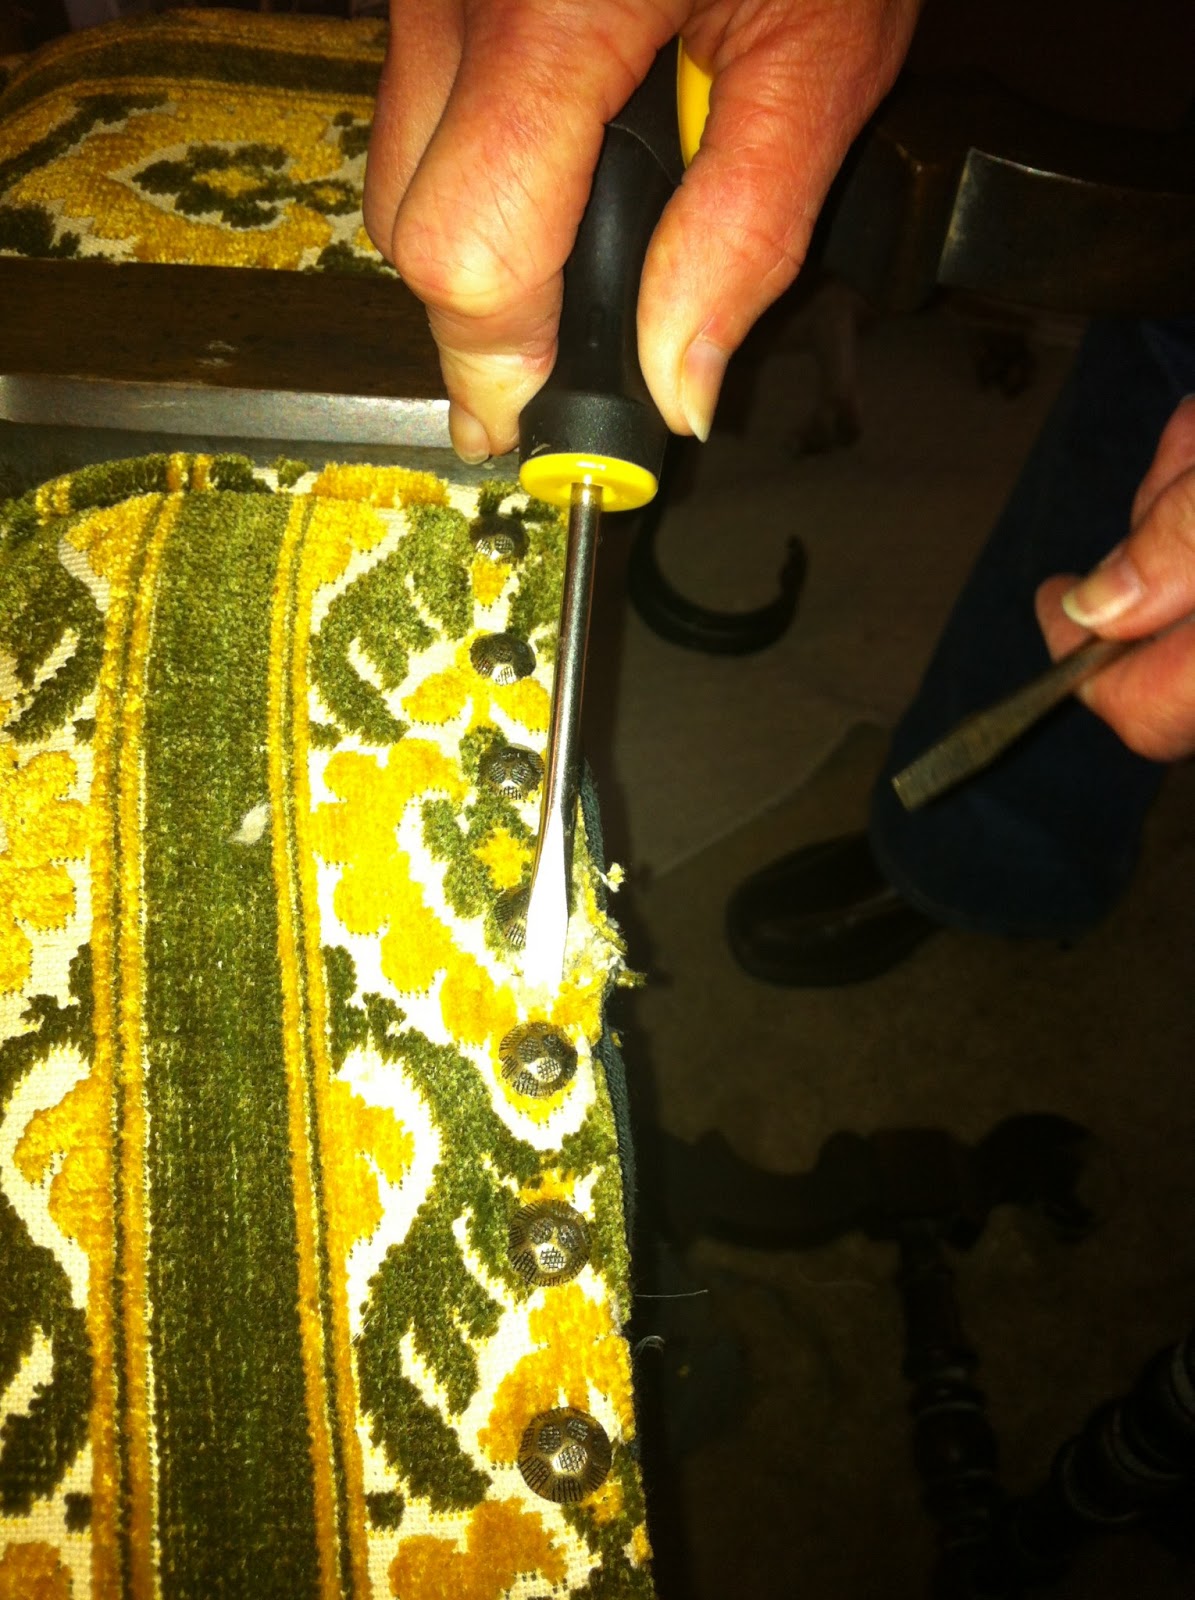
So we started to take the chair apart piece by piece.  We had to remove all of the trim and upholstery nails, and we tried to keep the stuffing intact as much as possible because it was in good enough shape.




When choosing a fabric we considered what would be strong enough to withstand my dogs.  I wanted a fabric that had some cream in it and wasn't too dark, but I couldn't have something with too much cream because that can look dirty fast.  Debbie found this fabric and I loved it. It's a perfect fabric and looks beautiful with the wood of the chair.  While doing the upholstery we definitely had to keep the pattern in mind to make sure that everything was lined up right!!  


I reused the upholstery nails and lined the back under the roll and the sides of the front seat back, which I thought added a little bit and looked really clean.  


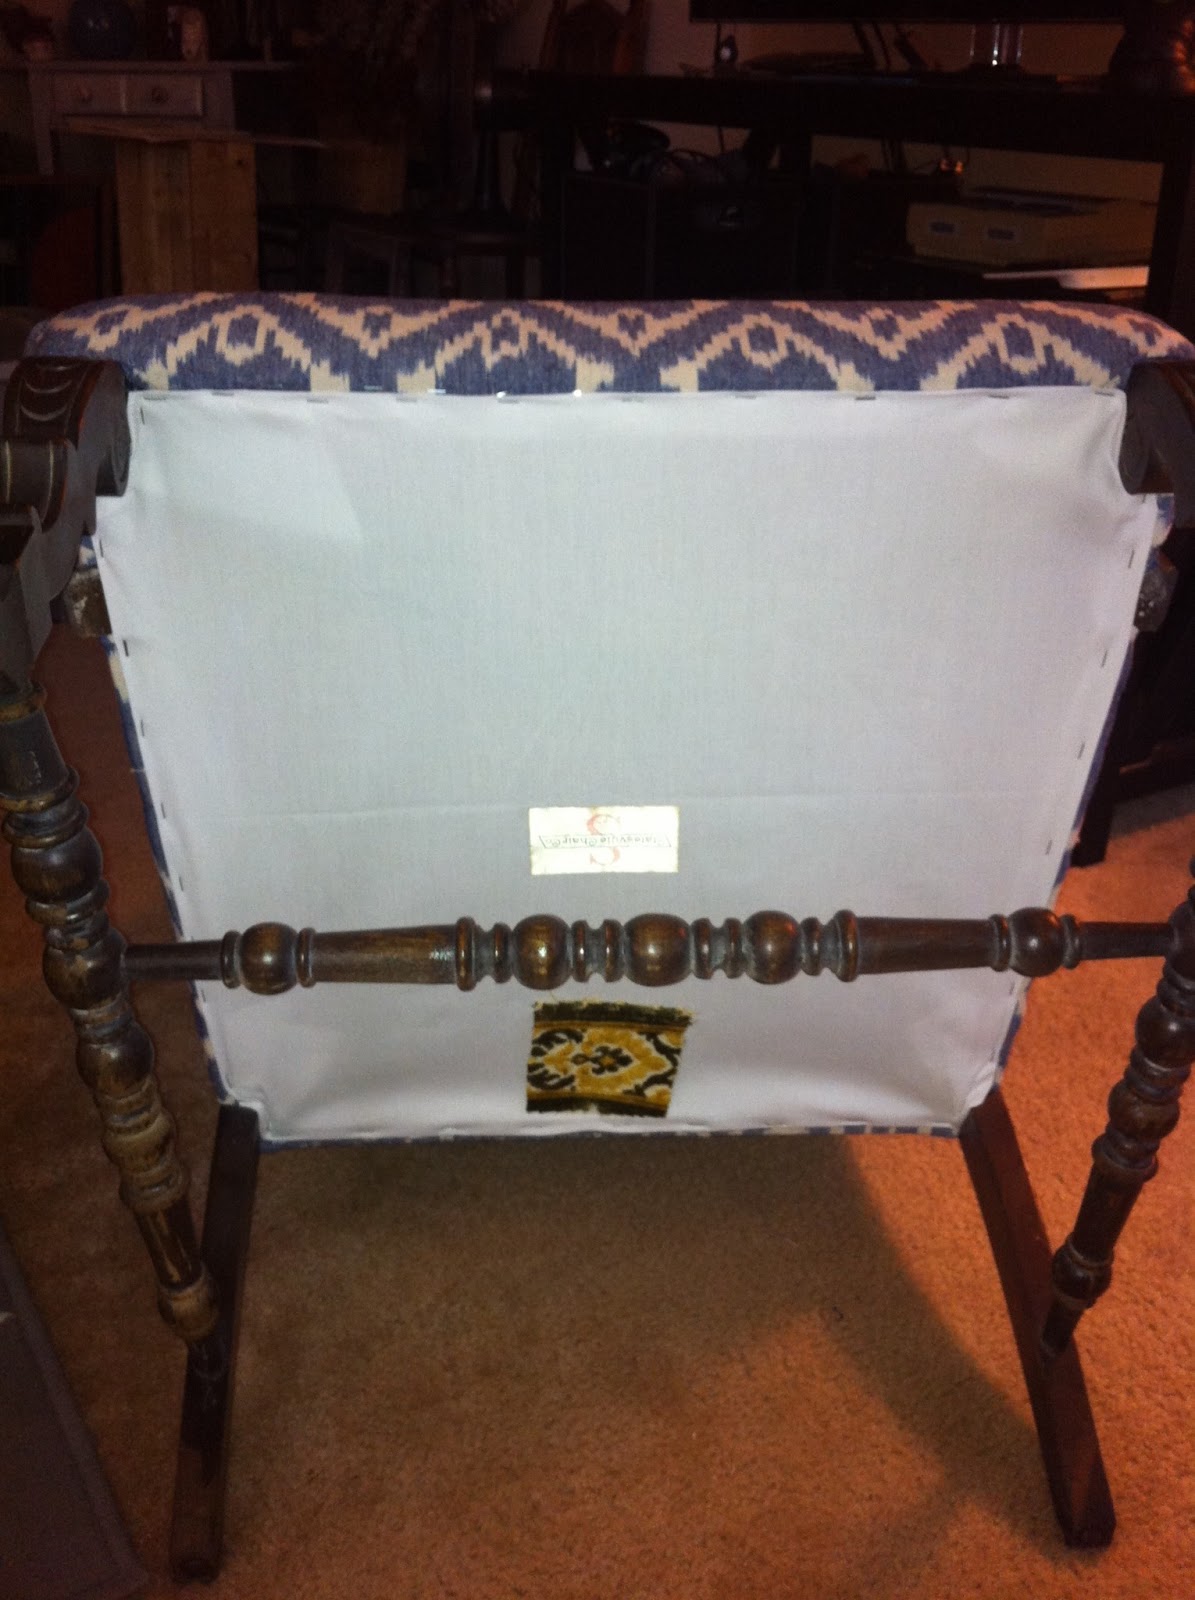
We used a plain, white piece of cotton fabric to re-cover the bottom, which had a dusty, dingy black mesh cover before, but we removed that in the destruction phase!  I kept the Statesville Chair Co. tag and reattached it on the new cover.  I also kept a piece of the original fabric and attached that on the bottom as proof of where the chair has come from. :) 


I am so unbelievably excited for how this chair has turned out. I could never have done it all without Debbie's help. I loved it before and knew it had great potential but am amazed how it's come together! It is way more beautiful than I could have ever imagined and I'm completely in love with it now!!


Weekend of Upholstery, continued!

Debbie and I quickly tackled reupholstering this bench the same weekend that we redid my chair.  I got this bench from the same friend that I got my Hoosier cabinet!! He was getting rid of this for free and I snagged it!!!! The 3 foot bench had a pea green velvet tufted fabric seat on a cream metal stand.  We easily unscrewed the seat from the metal base and spray painted the metal white to clean it up. I didn't care about keeping the tufting on this particular piece (and we didn't rip the fabric off on this one either, but just covered over it). We used a little bit of batting (stuffing) to give this older bench a little more cushion and to cover up the tufting.  We then covered it with our fabric (once again, strong enough for my dogs, and some white, but not too much because of the dogs...).  It turned out so well and is a great piece in my bedroom along the end of  my bed!!


Sorry.... all pictures are very candid... no staging here!! 


Saturday, May 25, 2013

It's been THAT long...??

It's been TOO long! My last post was a little under a year ago after I finished the last growth chart.  That was last spring/summer! I clearly got distracted by life and have not been posting very often. But I obviously get inspired in the spring and summer!! Anyway, I spent the rest of last summer working, taking little vacations here and there, and working on my porch "garden" trying to enjoy the extreme heat of the South! In the fall, I went out into the woods next to my parking lot and got a bunch of honeysuckle vines, which I boil and peel to use for my dream catchers.


I have many more and still need to take good pictures of them to post them, and hopefully sell on Etsy. This past winter my Etsy shop MyVintageBird  did pretty well, and I sold a lot of my Boobie Coozies... :)


So, that was just a quick, little update of what was going on in the past year I guess! I'm going to post a couple of things that I've been working on this spring on a separate post!


Sunday, June 10, 2012

Handmade, Personalized Children's Growth Chart - Jungle Fever PART 2!!!!

I just posted about the second growth chart that I've done, the first of which I made for my cousin's daughter's first birthday, and the second was for my boss whose son was turning 1.  My boss's mom saw the growth chart and asked that I make one for her boss's son! I quickly obliged :)

Here are pictures of the first two that I did, and then pictures of Hayden's growth chart!


******


Cedar's Growth Chart 


Emry's Growth Chart


*******


Hayden's Growth Chart


This is how most of my growth charts start out.  I make a rough plan on paper (complete with personal reminders!!) in which I plan out fit and placement and sketch out how I want things to look.  I also make lists of the supplies I'll need for each element.  I try to be relatively organized when I start out because I hate hitting road bumps in the middle and messing with my progress! Of course, there are always changes to the original plan. As I go along, things seem to come together on their own sometimes, which can work out really well!


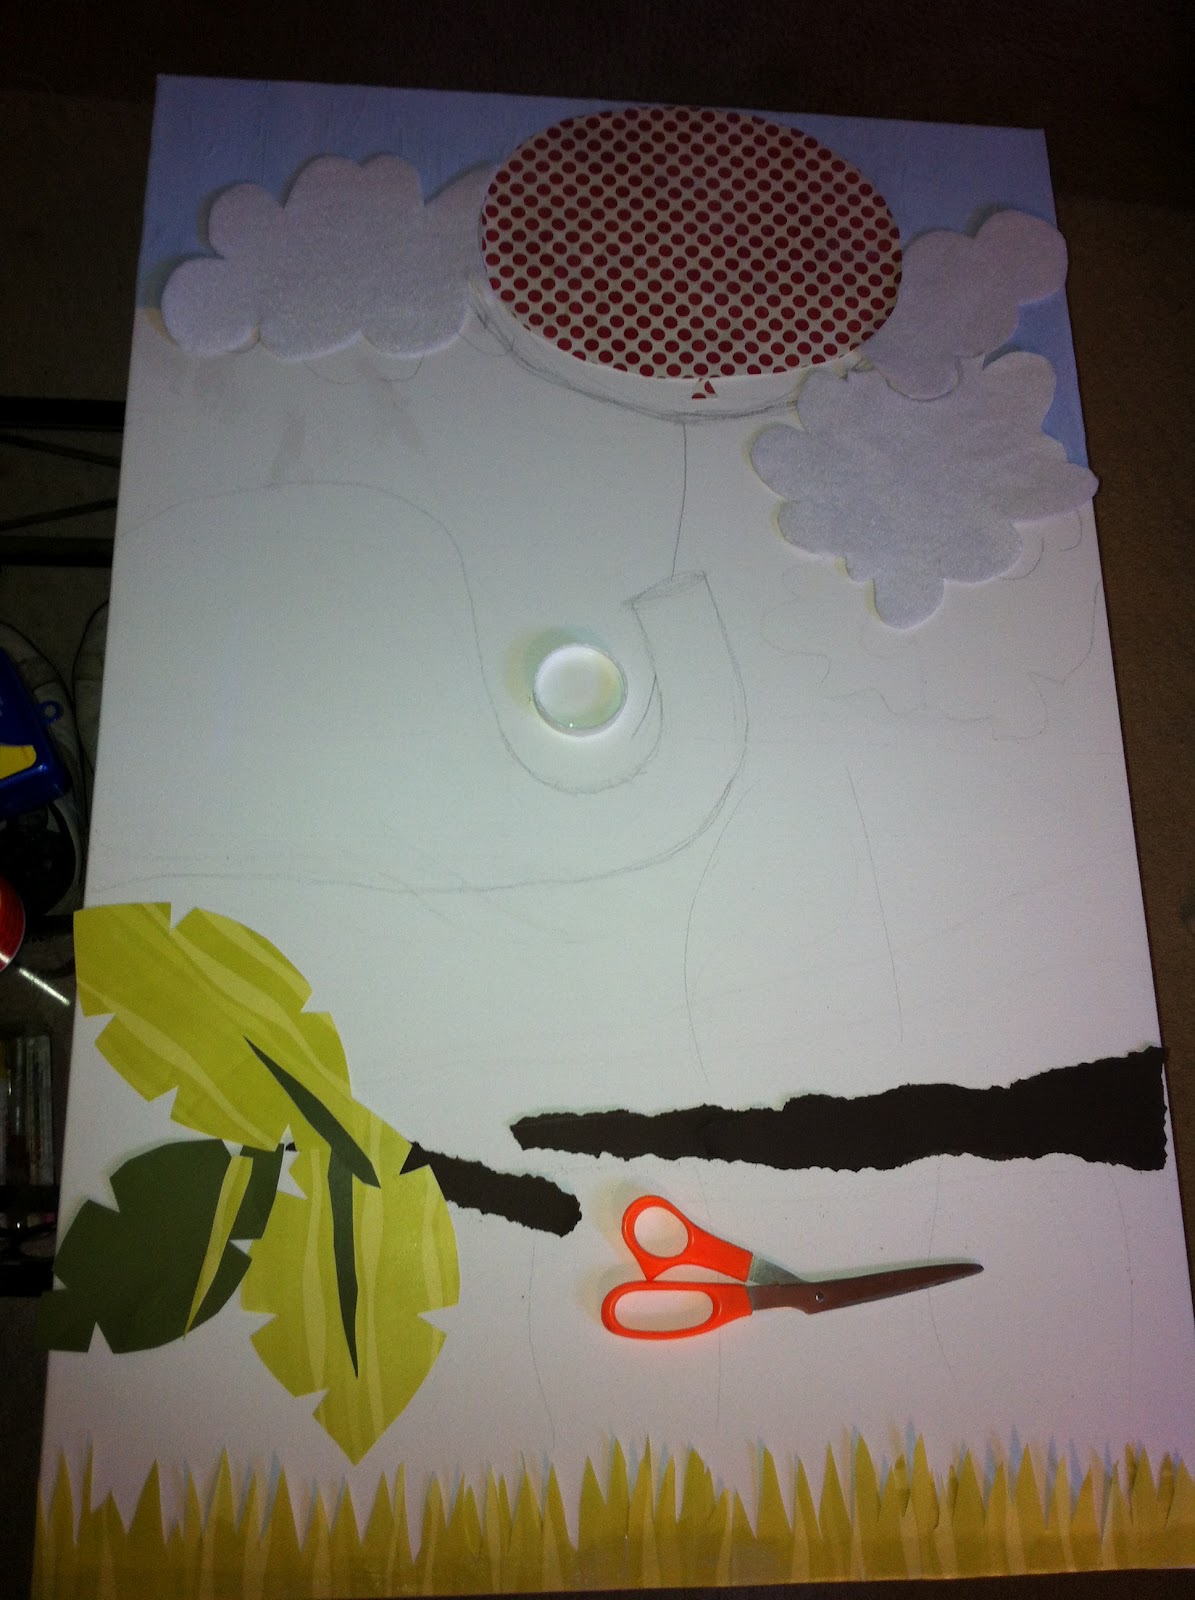
I then sketch out my plan on canvas and start placing the paper down without gluing it to see how things will look and if they will fit together well.  


Starting on the sky...


I didn't want to use tissue paper for the sky with this one, as I usually have with the other growth charts, and I found this amazing light blue paper that I liked instead.  I worked from the top down on this growth chart.


Working on the elephant. The "grain" of the paper ended up working so perfectly for this elephant!! It goes from right to left on the head and then tilted perfectly for the trunk. I will admit I didn't totally plan this but I love that it turned out so perfectly! I decided at the end to cut the notches into the trunk as well, which I really liked the outcome.


The adorable 3 monkeys! 1 and 2 have felt bellies.


The elephant was holding the string to the balloon.


The clouds are white felt and the numbers are a black velvet paper.


The FINISHED PRODUCT!!!!!!


***

I typically use plain little wooden birds, which I paint, as the height markers.  For this one, we talked about it and decided the alligator was super cute and worked with the jungle theme. We were deciding between the bumble bee (cute, but not as fitting), the alligator (cute and perfect), and the cloud (cute, but basic). I bought this completed alligator from Michael's and added the label area to its belly.


Thursday, June 7, 2012

Handmade, Personalized Children's Growth Chart - Jungle Fever!!

I made a growth chart last year for my cousin's little girl who was turning 1.  You can see the progress and details of her growth chart on this post on my blog! I really enjoyed doing it and thought it turned out really well.


So I did another growth chart, and this time I made it for my boss's baby boy who turned 1 this January.  We did her baby shower in a jungle theme, and she liked those animals and colors for him so I tried to stay with that theme. I also wanted to keep it really masculine for him.  Here is Emry's growth chart (sorry, iPhone photos!!!).


*********


This is pretty much how I start all of my growth charts. I buy a 24"x36" canvas from Hobby Lobby (a freaking amazing store because not only do they have good stuff, but their prices on canvases are awesome). I basically map out where everything is going to go on the canvas to see what will and will not fit.  I never stick exactly to my plan but I stay true to it for the most part so that nothing gets too out of whack at the end!! Nothing is more horrible than being almost finished and realizing you forgot something so I super-plan instead!! Here I have the bigger items mapped out and I am laying the giraffe spots out (without gluing them) to see how they look. 


I have started the sky by laying out blue tissue paper sheets one layer at a time until it's even.  I have roughly laid out where I want the yellow ripped scraps of paper for the giraffe's body.  I sometimes like doing this patchwork scrap method because it gives things nice texture.


I finished the sky by using blue tissue paper, and the giraffe's body. I didn't worry too much about covering the left side and left bottom area because I will cover those with the tree and the lion.  


Here I have laid out the spots, which I made from felt on paper, to make sure everything works together well.  


This is a close-up of the spots and yellow scraps laid out on the giraffe initially to see how everything is going to look.  You can see the lighter brown felt on the dark brown paper for the spots.  


I finished the giraffe and used a black button for his eye. I started the tree and the lion's body.  I put on the measuring lines, which measures in inches and has a thick line on each half foot and foot.  


I finished the tree, did more work on the lion's face, and have started the monkey who will hold the sign with Emry's name on it.  


Almost finished!! 


Here is the finished product.  A giraffe as the measuring guide, a monkey with a felt belly hanging from a tree, holding the EMRY sign, and a lion with a felt mane.  


Each piece is hand-cut and placed, and everything is uniquely made for this growth chart.  I really want to personalize these so the family has them for a long time as not only a growth chart but also as art for the child's room.  This growth chart has a jute cord on the back to hang from.  I started the measurement one foot off the ground so the bottom of the canvas would be 1', then the first displayed number is 2'.  I painted and used little wooden birds for the height markers.

I really enjoy making these and will probably start selling them on my Etsy store - MyVintageBird.