Sunday, August 11, 2013

Antique Wooden Folding Chair Re-Do!

Antique Wooden Folding Chair Re-Do!

A couple weekends ago I was at a great local antique shop called The Blue Building, and I always find some great pieces there.  This time I snagged a couple of awesome finds!! The first things I found were these amazing old metal pieces.  


This first one is an antique cobbler's shoe stand. It's cast iron so it's pretty heavy.  The shaft has this Forest City print on it - I've looked it up and there are a couple of Forest City Iron Works or Forest City Iron and Steel Co. out there that may have made this. It looks like it may be from up north around the turn of the century.  


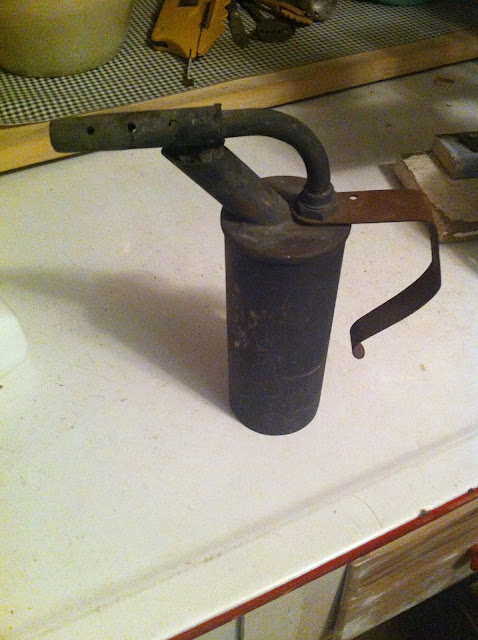
 The next piece I found was this antique torch.  It's a brass torch made by the Lenk Manufacturing Co. probably in the 50s.  This one has a very small amount of the label on the front of the bottle and the metal is very rusty. Nevertheless, it's such a unique and interesting find.    


First of all, I love metal pieces. And second of all, I love utilitarian pieces - things that have/had use.  I especially love useful pieces that are interesting or different in their construction - things that you haven't really seen before.  A lot of the things that I find are like that, and this chair is one of them.  Here's my before and after preview!!


One of my favorite things to buy (apparently) is chairs. I seem to really love chairs, and I have a lot of them... So naturally when I ran across this chair of course I feel in love. This is a really cool, antique, wooden chair with a pretty shoddy paint job, but the chair's construction and materials are solid.  It almost looks like an auditorium chair mixed with a folding chair. The coolest part is the strange way it folds up!


Instead of folding up the "normal way", in which the seat folds up to the back, this chair's back comes down and around to meet up with the bottom.  I loved it and thought it was so unique!! Here are more photos.


Here's the seal on the chair from the American Seating Company - Grand Rapids, Michigan. I've looked up the chair and gotten a little more information. The American Seating Company has been around over 125 years and specialized in school seating. One of the sites said this was a school chair from 1934.


So it was time to figure out what to do with the chair. I normally wouldn't mess with it. I really don't like re-doing antiques, but enjoy restoring them more. I never want to mess with the integrity of a piece or take away from it being an antique.  Unfortunately, this one already had a bad spray paint job, so my choices were to strip that and refinish the wood, or figure out another option. For some reason I was feeling a chevron pattern with this chair. I don't know why, and maybe I saw it somewhere recently, but I really wanted to do a gray and white chevron pattern. So I set out to do it!


Now, let me tell you, chevron is NOT easy...... I was in no way under the impression this was going to be easy, but JEEZ, I thought it would be slightly easier..... I had looked up different ways of doing it and had tried a couple of different way before re-googling how the heck to do it! I will admit that as much as I am a visual person, I am not a very spatial person, so that may have been some of my issue - I also tend to over think my projects and was getting cross-eyed looking at this for too long!! Finally I found this great idea of how to chevron on Eclectically Vintage, which majorly sped up my process! So here are photos of my taping out my chevron design (on the seat and back only - I am doing the frame in the gray).  


Any questions I had about whether or not the chevron would look good went out the window once I got it all taped out.  I even loved this tan color of the tape in this pattern!! 


So I'm all taped out and ready to paint. I bought a little sampler size of this great slate gray color. I painted around my pattern and all the frame of the chair with this gray.  


Here's the finished product!!! I finished at night so this picture is a little dark.  It turned out so well and I couldn't be any more pleased!!!!!!!!!


Here's a shot of the back. I painted it all gray like I did the frame.  I took this picture at night when I finished so it's not the best quality - it almost looks green instead of gray!! 
This does show the hinges and metal pieces used on this chair. They were covered in layers of paint and I really wanted to uncover them. I removed almost all of the old paint using acetone and cotton balls/swabs. I love the exposed metal now!!!


Shot from the next morning with better light - still just as beautiful as I thought!!!!!! 


This was my effort to maintain the historical part of this chair. This is the bottom of the seat that had the label shown above.  I felt okay about painting over this chair, but there was no way I was going to paint over the label. So i taped off around it and painted all around it. This area will only show when it's folded up, but at least the label and history were maintained! 


GRAND FINALE!!!! 


Monday, July 8, 2013

DIY Tufted Ottoman

DIY Tufted Ottoman

So I've been wanting an ottoman in my living room for a while, and I had decided that I could make one for a little cheaper than I could buy one, and I'd be able to personalize it! So I started looking around for cheap, or thrown out, wooden side tables that I could use as the base for the ottoman. I was having a really hard time finding a table that was right for what I wanted and was cheap enough to make it worth it.  I was also starting to get impatient looking for a side table so I started thinking about how I could just completely make my own. I knew Home Depot had table legs and wood so I decided to check it out.

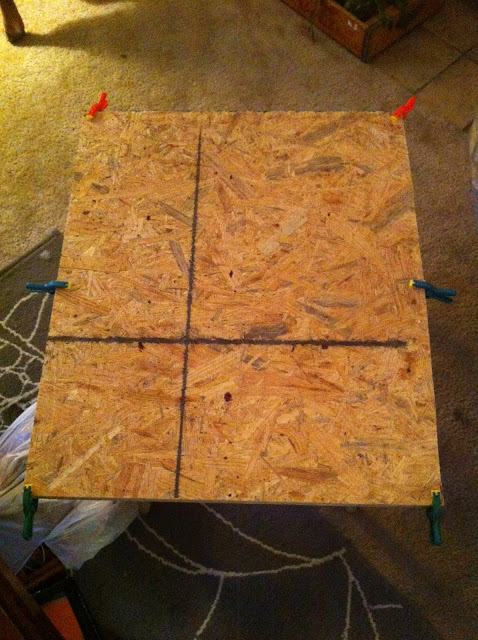
These are the legs that I found at Home Depot - they are 9" and came bare, but I stained them this dark stain.  Here is the particle board that I found to use as the base. I bought a 2'x4' piece of 1" particle board.  I had the guy at Home Depot cut the wood in half lengthwise for me so I had two pieces of 2'x2' board.


I really wanted to use these pieces for two separate ottomans but after thinking about it more, I really didn't think one piece would be sturdy enough, so I decided to double up and glued them together for more stability.  


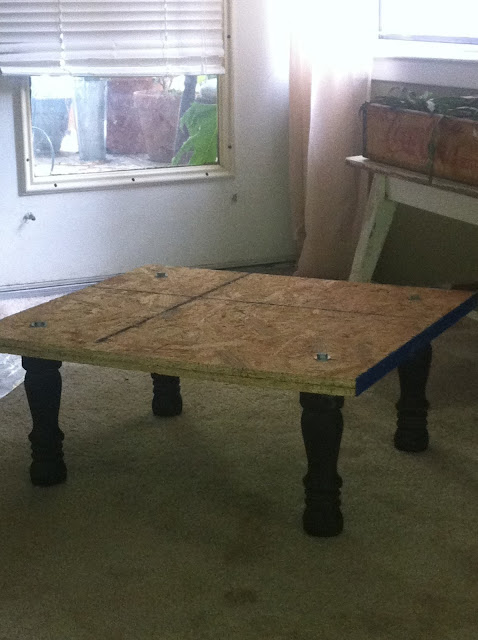
The legs come with screws already in the top and they hang out about 1". Normally you can use these screws to attach these legs to furniture, wood, etc. With the particle board that I found though, the screws wouldn't be stable enough and over time could loosen in the board. I thought of some different ways to attach them and eventually came to a decision. I decided to screw holes through the board where I wanted the legs to be.  I removed the screws that came in the legs.  I screwed a long (2.5") screw through the top of the boards into the legs (I made sure it was long enough to go into the legs and offer support, and thick enough to fit snugly in the old screw holes.  Here we are screwing in these screws through the board and into the legs.  


Kev and Danny!


Here's a shot of the base for the ottoman.  At this point I was deciding between doing a regular ottoman versus a tufted ottoman. I had found some really great tutorials for doing tufting, like this one on Five Days 5 Ways, or this one on Addicted 2 Decorating. So I decided to be gutsy and give it a try!!!! It's hard to see in these photos, but I marked out evenly spaced holes that I would use for tufting the ottoman.  


I was thinking about what fabric I wanted to cover the ottoman in.  I know (in general and especially at my house!) fabrics used for upholstering are going to need to be pretty solid and thick fabrics because they suffer a lot of wear and tear - especially in my house with 200 lbs. of dog! So I wanted to chose a fabric that would be strong enough for the wear and tear it would go through but would still be a workable, attractive fabric. 
Some years ago I had been in World Market and saw this amazing high back sitting chair that was covered in a light colored canvas fabric with multi-colored buttons. I loved that idea and had never forgotten about it. Because I had already been thinking about possibly doing a tufted ottoman I decided to go ahead and do it, and I could use the idea I saw at World Market years ago! I went to JoAnns and got a great light tan, thick canvas fabric. I went back and forth a bit - I LOVED the idea of doing this light cream fabric with some amazing multi-colored/multi-fabric-ed buttons, but if I was worried about wear and tear with my big ol' dogs, how in the world was a light cream fabric going to hold up in my house?! I could have gotten a darker colored canvas fabric, but my heart (and my wallet) was already set on the one I had purchased. I decided to go for it and realized I may have to pay a little more special attention to keeping it clean.  
Now it was time to do the buttons, which was almost the most exciting part!! I have all these amazing fabric scraps from year and years of hoarding.... ;) and I was so excited to go through and choose my favorites.I wanted colorful fabrics that were all different but that all worked together as well. I had found a great tutorial on how to cover your own buttons without buying the button cover tool on Make it & Love it, and I figured with the bags of buttons I have (I'm telling you... hoarder....) I thought I'd have enough of the right buttons - I needed the buttons with the shaft in order to get the best outcome with the tufting.  In the end, I did't have enough of the correct buttons so I decided to go ahead and buy the button cover tool kit from JoAnns, which actually worked out great. 
Here are photos during the process.


Above, you can see the finished product of my buttons.  On to covering the ottoman now.  As I said, I laid out the pattern for the buttons. I decided on 7 total, but I could have done a couple more, or even a couple less, just depends on the look you are going for.  I followed the same pattern that I laid out on the board for the foam.  Foam can be pretty expensive so try to catch it on sale or with coupons! (I had a 60% off coupon for JoAnns.) I also used a few layers of batting to fluff up the ottoman a bit. 


Now it was time for covering and tufting!! Follow the directions set out by the tutorials I have linked above, but this is basically what you do... Take your fabric and drape it over the foam, stuffing, etc. just like you would if you were about to upholster it. Make sure it is even on all sides and that there's enough spare fabric on the sides to give for the tufting and then allow you to upholster.  Once the fabric is laid out you can start with the tufting. You pull the button down in the designated area and using a massive 6" upholstery needle you pull the thread all the way through to the bottom.  Then you staple the thread in the bottom of the board in a zig-zag pattern for more stability. Continue this for each button. At this point you want it to be tight but you also want to have some give because you'll pull it taut when upholstering.  


I'm finished with the buttons and have flipped it over to finish the upholstery process.  I carefully pull the fabric taut and begin stapling it to the underside.  I do this little by little, and side by side, to make sure that everything is even and not being pulled more on one side than the other.  


Here's the finished product!!!


Here's a view from above of the tufting and the buttons.


Here's the ottoman in front of the chair I reupholstered a couple months ago!! The creams match so well and these two pieces work together perfectly!! It's an amazing addition to my living room and works as both an ottoman and extra seating if we need. It was easy, relatively inexpensive, and a quick, weekend project - I will definitely be making more in the future!!


Sunday, July 7, 2013

Weekend of Upholstery!

Recently, The Amazing Debbie was in town visiting! She comes into town every 6 months or so and turns my apartment upside down (in a good way though)! She helps me look at things differently and tackle projects I wouldn't normally be able to.  
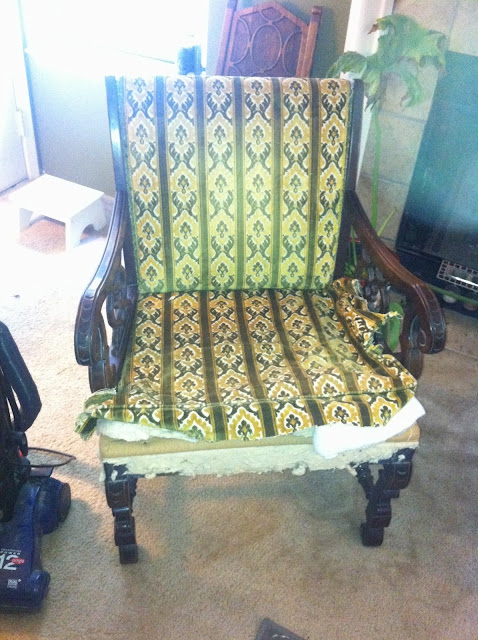
So there we were with this chair... I got it for $10 at my work's bi-annual yard sale/thrift shop and was so excited to have snagged it for that amount!!!  It is a solid wood Statesville Chair Co. chair that had some pretty truly vintage fabric.  The chair is in great condition, and really the fabric was in great condition as well.  While there was nothing wrong with the fabric quality-wise, there was a problem aesthetically... while I appreciate the vintage value of the velvet green and gold brocade fabric, it just wasn't quite the look I was going for. I did, however, really like the "bones" of the chair - the little scroll work, the wood details, and everything was in good condition, especially for redoing.
  
So here are pictures of the chair before.


So we started to take the chair apart piece by piece.  We had to remove all of the trim and upholstery nails, and we tried to keep the stuffing intact as much as possible because it was in good enough shape.


When choosing a fabric we considered what would be strong enough to withstand my dogs.  I wanted a fabric that had some cream in it and wasn't too dark, but I couldn't have something with too much cream because that can look dirty fast.  Debbie found this fabric and I loved it. It's a perfect fabric and looks beautiful with the wood of the chair.  While doing the upholstery we definitely had to keep the pattern in mind to make sure that everything was lined up right!!  


I reused the upholstery nails and lined the back under the roll and the sides of the front seat back, which I thought added a little bit and looked really clean.  


We used a plain, white piece of cotton fabric to re-cover the bottom, which had a dusty, dingy black mesh cover before, but we removed that in the destruction phase!  I kept the Statesville Chair Co. tag and reattached it on the new cover.  I also kept a piece of the original fabric and attached that on the bottom as proof of where the chair has come from. :) 


I am so unbelievably excited for how this chair has turned out. I could never have done it all without Debbie's help. I loved it before and knew it had great potential but am amazed how it's come together! It is way more beautiful than I could have ever imagined and I'm completely in love with it now!!