Saturday, March 19, 2011

Distressed Guitar

Here are pictures of the finished product from the  guitar that my brother gave to me to redo for him. 
Check out the process below!


**ORIGINAL POST**January 10, 2011**

In the December 2010 issue of Guitarist magazine my brother, Adam, spotted something he liked. He ripped out two pages and handed them to me and said, "Do this" (you have to know my brother). A while ago, he had given me a Harmony electric guitar he had gotten from a friend years ago. All the hardware was missing or broken and he had carved his and Eric Clapton's initials all over the guitar (once again, you have to know Adam). He had asked me to paint it, design it, do whatever I wanted to it. I put it in my craft area and left it untouched for over a year now - every once in a while I'd pick it up waiting for inspiration... and nothing. I didn't want to do anything too tacky or young. I wanted it to be something he could keep his whole life and it would never lose it's relevance. In other words, I wanted to do something timeless, and I think this idea of "relic-ing" the guitar is perfect for him.  Of course, Guitarist was displaying '60s Fenders and I'm working with a 1992 (?) Harmony. It's still turning out well so far...

This is one of the guitars featured in Guitarist magazine. This is the one my brother really liked, without the "extreme relic" on the back, so this is about what I'm going for.


First thing's first, gotta take the old one apart.  You can see the E C carving in the front and an A in the top left.  There were also some scratches and initials in the pickguard (the black part). I unscrewed it all to sand and paint. 


This is the beginning stages of sanding. I'm using a round power sander with 40-grit sand paper. I loved this half-way look - I was tempted to keep it like this.  I have to sand the pickguard a little bit with fine grit sandpaper so the spray paint sticks.  I'll then spray the paint on evenly for about 4 or 5 coats. 


I put the guitar together just to check it out.


Here's the guitar sanded down bare.  The pickguard is painted white - only 3 coats at this point.  I'll do another 2 coats probably.  Once again, I love this version. I really want to keep it bare with the white and silver accents.  I love the bare light wood. 


I put the pickguard on to really see the white with the bare wood.  I love this!! Next step is priming and painting though. Then I have to distress it a bit to give it the worn look. 


This project will take some time and be delayed a little bit because of the weather.  I don't have a heated space to spray paint so I have to wait until the weather warms up a bit in order to start priming and painting the body.  I've been working slowly at getting the pick guard painted.


Progress to come!!!


**March 19, 2011**

I started working on the guitar again and began with the painting stage. I got both white and blue paint (even though the blue paint had a primer in it) because I wanted to have the base of white so when I sanded down the blue layer the white would show through. 

This is the plain white on the back. The front and sides have already been painted. 


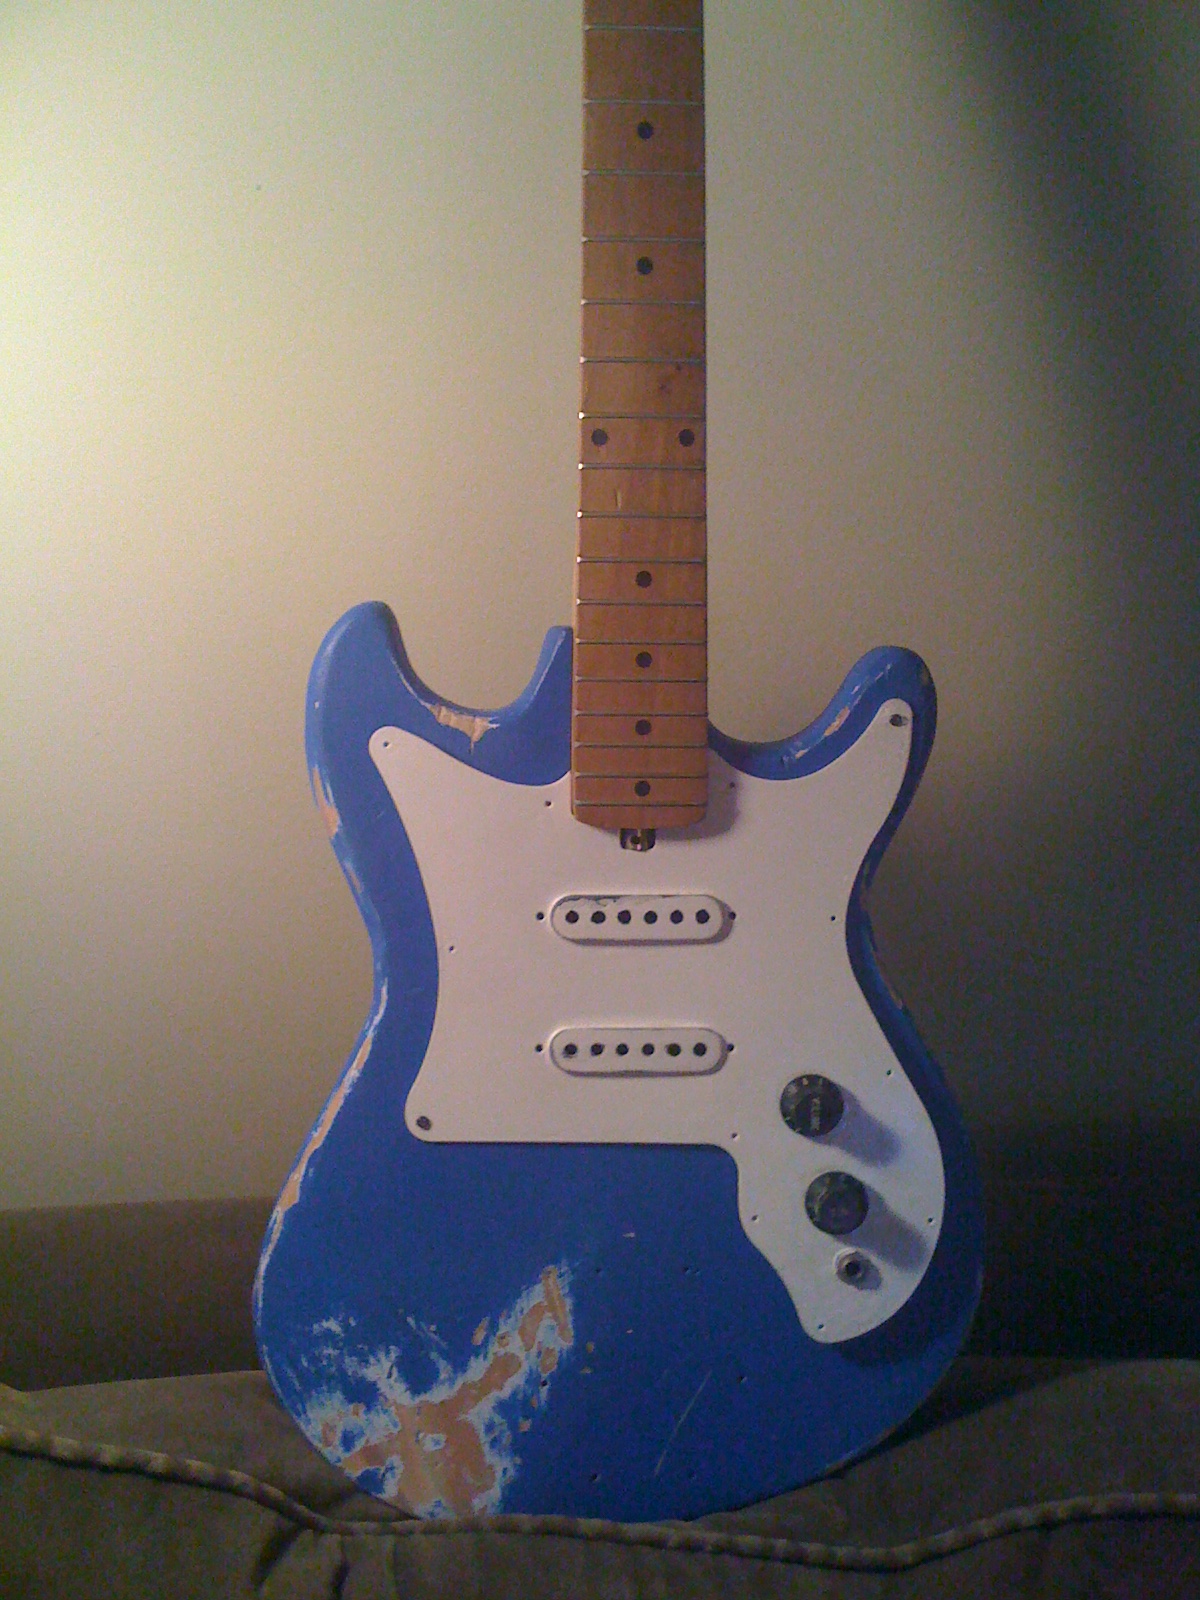
This is the finished blue guitar before any distressing. 


I put the pickguard on to check out how it looked. I love the contrast, and once I peeled the tape off the knobs I think the black is another great contrast. 


I screwed the neck back on because I wanted to be able to hold the guitar and see where the most wear and tear would happen naturally as the guitar would be held and played.  I wanted to make it look like this guitar had been on tour, or heavily used, for years. 


I started relic-ing, or distressing, the guitar by basically beating it up.  I smacked it with just about anything I could find, but mostly screwdrivers, wrenches, and a chain.  I started on the front. I began sanding down heavily rubbed areas (where the right forearm goes across to strum) with a fine-grit sandpaper, steel wool, and a wire brush. 


I then moved on to the back of the guitar.  I focused on the spots where the chest and hip rub against the back.  I used the same technique as I did on the front. I basically used anything I could find to start distressing and create nicks.  Then I followed up with wearing the areas down with sandpaper, steel wool and a wire brush.   

I did all the same things around the sides and edges.


And again, here are shots of the final product - front and back.


I love the guitar and my brother is very happy with it.  He's going to work on the hardware and electronics and get it back functioning.  I'm definitely on the look out to do another one in the future!


Tuesday, March 15, 2011

Pickle Me Tink

Ok, I know the title is a bit cheeky, but I couldn't help myself. I refinished an awesome corner table by pickling it. Now I love the word "pickling" and can't stop saying it....
  I was helping my friend Eric paint his new room one day and he was going to be getting rid of this unique corner table his dad had had since he was young.  I had to snag it before it was too late - I'd never seen a table like it before.  It has a cute, little front drawer for some small storage.  Stamped on the bottom was 1956.  I asked my dad's wife, Debbie, who does tons of amazing things with furniture and is my go-to-expert on refinishing furniture (among many other things), and got some great advice and direction from her on both how to prep the wood for finishing, and refinishing the table.  She has a great knowledge of what to be on the look out for and how to prepare for your project - although she's no stranger to making a mistake and moving on from it!
Check out Debbie's complete "Wood Refinishing Tips" on my Guest Blog Posts page!


 Here are Before and Afters of how it turned out. I'm very happy with it and I think it looks so clean and much better than before! It's very "cabin chic", or something like that, and I like it! **iPhone photos for now, agh!**


Here is a top view of the table.  The rings and state of the table are really shown in the "Before" photo.  


This is how the space turned out. I have to add the knobs and the accessories but I like how it's turning out and it's making me like my place a bit more, because I was starting to give up.


 These are Debbie's Steps for Refinishing Wood Furniture:

   Step One: Assessment  - 
We need to talk about what is going on with the piece right now.   What is it covered with... polyurethane, tung oil, wax, shellac, lacquer, etc?  It seems to have some stains on it... are they old water stains or burns?  Are there lots of nicks and scraps on the top or the legs?  Does the drawer slide well?  Is it dovetailed or just nailed together?  Is the top attached to the base firmly?  Are the legs loose?  How is it built underneath?  
  This is a great list of questions to keep in mind when choosing a piece and/or figuring out how to refinish one.  This is how to assess a piece and figure out how to maneuver around its issues.  The largest problem with my table was the large stains on the top - there were a couple round, presumably water stains that were pretty sizable. 
   Step Two: Preparation -
After you assess it, you need to wash it down with some Murphy's Wood Soap or very mild (Ivory) liquid soap and a soft t-shirt cloth.  Then you can see what was dirt and what is a stain or abrasion.  If you can describe the coating on the piece then you can figure out how to get it off so that you can either stain or paint it. Old paint or coating either needs to come off or significantly roughed up before you can do anything.  
  Once cleaned I realized I had a pretty clean piece of wood to work with, just some stains to try to minimize. She had an amazing reference for removing stains and water rings from wood.  Everything from toothpaste to baking soda with water to mayonnaise is on the list.  (List is in Guest Blogs).  
  Step Three: Removing Stains - 
Wood furniture takes special care. That’s why so many of us use covers and coasters and take other means to protect our wood pieces. When accidents do happen, a white water stain or ring is left behind. This doesn’t have to be the end of your furniture, however. There are steps you can take to rectify the damage, and hopefully, save your wooden piece from the dumpster. (Not Debbie's words! (For those of you MLA/citation nerds)).
  So, I lightened the stains on my table and moved on to lightly sanding it.
  Step Four: Sanding - 
Go for the light sanding with 150 grit sandpaper and a palm sander for the top and sides.  Just use your hand and strips of sandpaper that make it all the way around the legs. 
  I had to be pretty careful when sanding because the wood was relatively delicate on top. I didn't use a power-sander at all and just stuck with hand sanding.  I had decided to do a white wash/pickling look with my table.  I thought it was already such a cute, shabby chic little table and white would go so well on it. Debbie made a good point of pickling the wood, instead of a darker stain or paint, because pickling really allows the stain to show. 
  Step Five: Staining/Painting - 
I think that if you like a white color, it would be great to put a white water-based stain on so that the grain shows through since it really has a pretty grain.  Though you have to decide whether that would be "shabby chic" enough for you.  I like the White washed Pickling Stain http://www.minwax.com/products/color-guide/ but there are other color options that may be interesting.  


I still have to add knobs and I am thinking of getting silver knobs kind of like these:


I compiled this list from Google images because I thought these were a great reference point for what I can look for.  I'll take anything from a sleek, simple knob, to a more vintage one. I like an ornate design or a classy, chic knob.  


Sunday, March 6, 2011

Growing Tree Details

So I just finished the Growing Tree Growth Chart for my cousin's baby who turns 1 today!! My last post included the project's progress.  Now I am including a more detailed description of what everything is and how it was done.  I loved this project and love the way it turned out!!


This is the finished product:
  1.) This is the only bird I ended up attaching.  This is for her birth information and says "Cedar Rose, March 6, 2010, Birth Weight: Birth Height:". I did not get a clear enough picture of this to include it, but I got good enough shots of the other measuring birds. 
  2.) My cousin loves mushrooms and I think they are so cute.  I was going to try to cut my own out of balsa wood partly because I am crazy but partly because I am so stubborn - I think if you are going to hand make something, you should HAND MAKE it... but that's the crazy in me... but I realized there's no reason to do that if you can find already made pieces that work together.  So I compromised with myself - I didn't hand make the mushrooms, but I found pre-made balsa wood bells and baseball bats and used them together.  The bells (two different sizes) had a round piece on top and one coming out of the bottom - I snapped/cut them off and sanded them down.  I then attached the bells to the baseball bats. I painted them and made the spots with paper.
  3.) I had gone back and forth with the tree knots many times. At first, I was going to use them as the measuring labels.  Then I wasn't sure if I should make them out of wood or cork. Then I wasn't sure I was going to include them at all.  I finally thought of carving the cork to make it look more like a real knot. I decided to use the cork because a) it's eco-friendly and b) it's easy to carve.  I carved out the middle and cut down the side and I painted it.  It was difficult to match the brown of the tree trunk, but I decided I liked it anyway and thought it was a cute, 3-D touch.  
  4.) I randomly found the balsa wood name-plate.  It worked so well .  I found this awesome white-washed fence paper I had and it was perfect for the name plate.  I glued on the jute cord to make it look like the name plate was hanging from the branch. I painted and attached the letters - I don't always do the stereotypical pink for girls but my cousin had said she liked pink and brown and I thought the pink looked great against everything.   
  5.) My cousin had asked if I could try to include a wild rose, and because Cedar's middle name is Rose I really wanted to be able to, but I was not sure how to incorporate it so I wrestled with it for a while.   Once again, I thought I should make the flowers myself, but walked into Michael's and immediately saw some flowers that caught my attention. I took the pre-made tissue paper roses and ripped off the little center cone-shaped petals and glued on a second flower that was more like a wild rose. I painted the centers yellow.
  6.) I made the owl's body and wings out of football patterned paper, which is pretty much unnoticeable but gives it good depth/texture.  The eyes are just plain, white paper and the beak is orangish paper I had.  I used a black, velvet paper and a hole punch for the owl's and birds' eyes.
  7.) The tree trunk is decoupaged on.  I really wanted it to look like bark on the tree and have good texture.  I found a great patterned paper with a "dirt" pattern on it that was perfect to rip up and put on like bark. I crumpled up some pieces then laid them somewhat flat to give it the texture I wanted.  I added little pieces of tealish paper to resemble moss on the tree.
  8.) I really wanted to have picture frames of some sort on here, so I made picture frames look like birdhouses.  I bought little wooden picture frames and cut the two pieces of wood for the roof.  I covered the right house's roof with pine cone pieces.  I added the mini name plate and painted her last name on it.
  9.) The tree top background was made with two different papers. The lower paper was a darker, muddled camo. The upper paper is a forest pattern.  The leaves are a thicker, dark green, textured paper.  I didn't want to overwhelm it with leaves so I only scattered them around.  They are very well-glued on and completely baby/child-proof.
  10.) For the sky, I glued multiple layers of light blue tissue paper and painted over it with a blue wash to blend it all.
  11.) I used the same black velvet that I used for the bird and owl eyes as I did for the "ruler" and the numbers.


This is the back - I screwed in the picture hanging rings, twisted a couple of jute cords and tied them on to make a hanger.  
I made two pouches out of a paper grocery bag to keep the birds in so that they don't get lost or scattered.  Because they are on the back, too, and will be against the wall, Cedar will not be able to get into them easily.   


This is a close-up of the pouch and the birds. I made 12 birds in total, so 6 in each pouch.  The label area says "Cedar Rose, Date:, Age:, and Height".