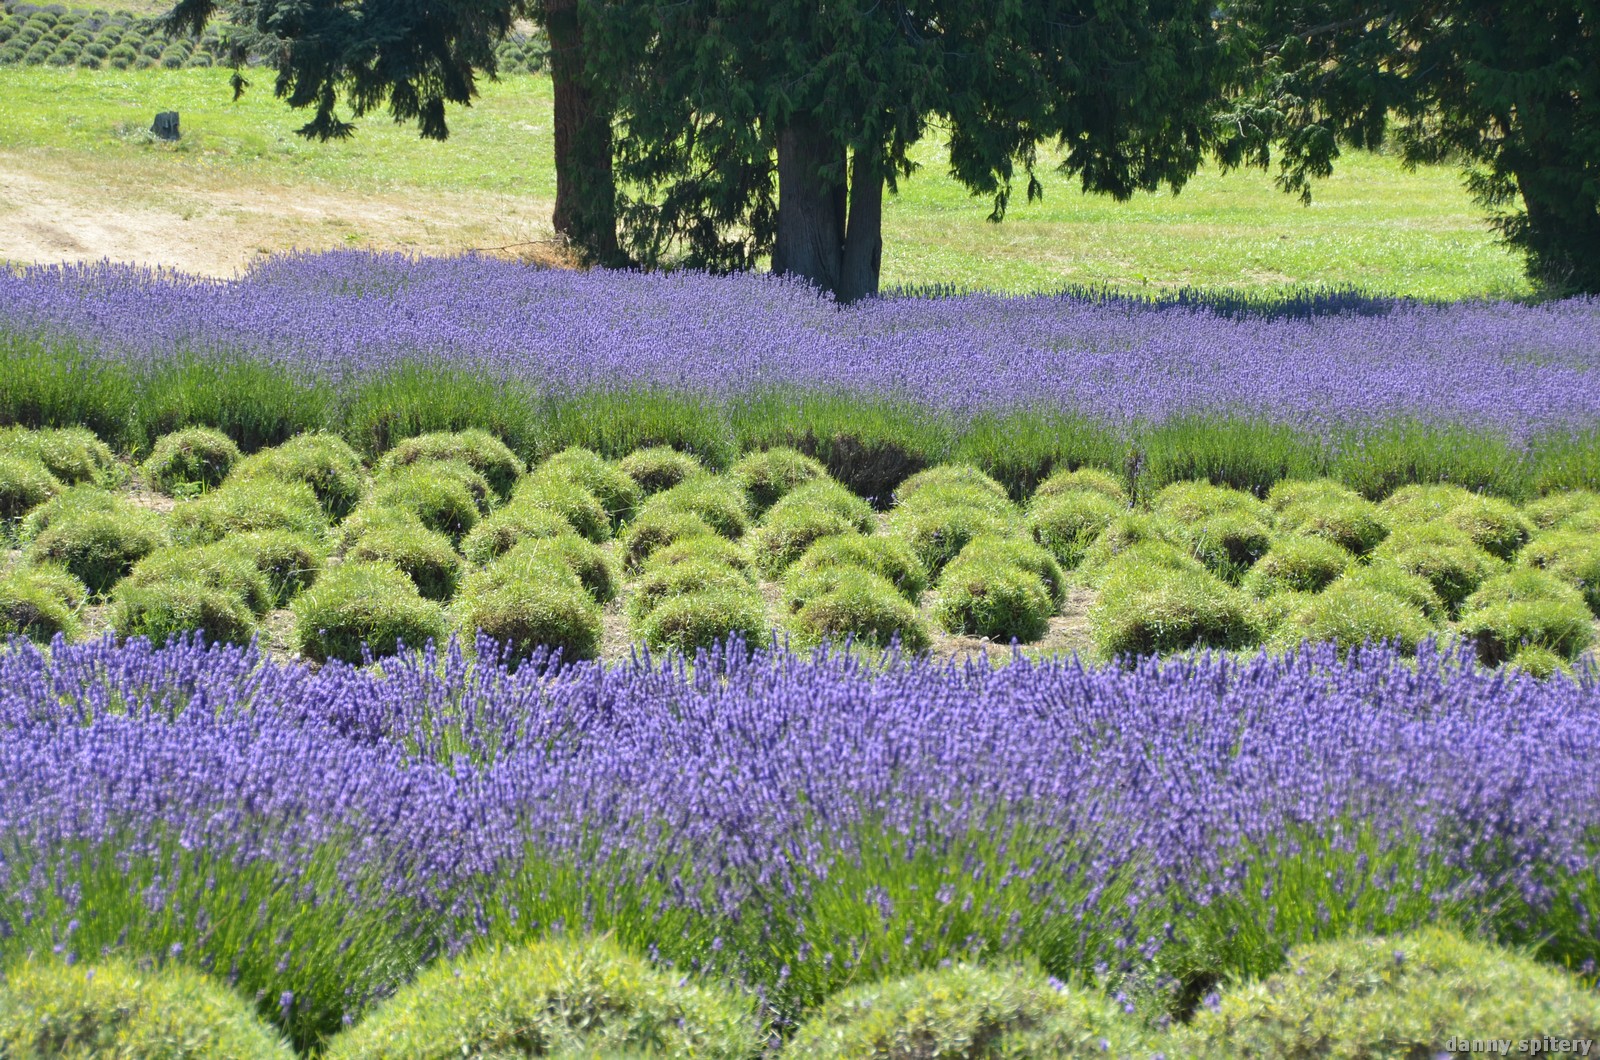
Almost all my family is, at one point in time, from the Seattle area. I was born in Seattle, but moved away when I was just a baby. Every year or two, we would go back and visit our family that was still living there. Here are some photos of things that remind me of 25 years of visiting the Seattle area and are so quintessentially Northwest.
I saw these on Ruffled and absolutely loved them. This is a pretty simple project for a weekend and gets great results!! The directions are on Ruffled's site and it pretty easy from there. I used an oil spray instead of vaseline on the balloons. Definitely put down something to cover the floors and surrounding areas, wear something that can get messy, and use something to hang the balloons from. Once they had dried for at least 24 hours I used fishing line to hang them
This is the picture from Ruffled. I love these chandelier balls outside hanging from a tree. They show this as a wedding idea and I think it's beautiful, but it can also be used for everyday decorating.
**********
Here are some (iPhone) photos of when I made these. I had an adjustable rod hanging above my cabinets from which I tied fishing line to the balloons. I used black balloons so I could really see where the yarn laid down. This is definitely a project for 2 people. One person has to string the yarn through the glue and cornstarch mix and not let too much mixture remain on the yarn, while the other person has to wrap the yarn around the balloon, which can get slippery.
I tried to use glue to lay down as much of the frizz and fly-aways you can see around the yarn (when this dries it can look messy).
This is just a quick video of popping the balloons. This part was fun!
Here are three almost finished products. These dried for around 24 hours until they felt completely hardened. The balloon was popped and pulled out of the yarn ball. You can use chop sticks or paper towel, carefully, clean out inside and around the webbing to remove excess.
I bunched these by length and position and tied them up with fishing line. I love how they almost float, and I love the positioning, especially when they spin.
I got this beautiful, wood corner table built in 1956 from a friend who was going to get rid of it. It had some water stains, burn marks, and general wear and tear on it. I asked the Amazing Debbie how to take care of all of these problems and fix this table up like new but still give it a used, "lived-in" feel.
Here were, and are, Debbie's Tips on Refinishing Wood Furniture:
*********
Debbie's Steps For Refinishing Wood Furniture
Step One: Assessment -
We need to talk about what is going on with the piece right now. What is it covered with... Polyurethane, Tung Oil
, wax, shellac, lacquer, etc? It seems to have some stains on it... are they old water stains or burns? Are there lots of nicks and scrapes on the top or the legs? Does the drawer slide well? Is it dovetailed or just nailed together? Is the top attached to the base firmly? Are the legs loose? How is it built underneath?
Step Two: Preparation -
After you assess it, you need to wash it down with some Murphy's Oil Soap or very mild (Ivory) liquid soap and a soft t-shirt cloth. Then you can see what was dirt and what is a stain or abrasion. If you can describe the coating on the piece then you can figure out how to get it off so that you can either stain or paint it. Old paint or coating either needs to come off or significantly roughed up before you can do anything.
Step Three: Removing Stains -
"Wood furniture takes special care. That’s why so many of us use covers and coasters and take other means to protect our wood pieces. When accidents do happen, a white water stain or ring is left behind. This doesn’t have to be the end of your furniture, however. There are steps you can take to rectify the damage, and hopefully, save your wooden piece from the dumpster." (Not Debbie's words! - The tips on Removing Stains is something Debbie has compiled over the years and has come from many sources). Check out the Removing Stains tips below!
Step Four: Sanding -
Go for the light sanding with 150 grit sandpaper
and an orbit sander
for the top and sides. Just use your hand and strips of sandpaper that make it all the way around the legs.
Step Five: Staining/Painting -
If you like a white color, it would be great to put a white water-based stain on so that the grain shows through since it really has a pretty grain. Though you have to decide whether that would be "shabby chic" enough for you. I like the White Wash Pickling Stain but there are other color options that may be interesting. For more information and wood stain options check out the Minwax Stains Color Guide.
***************
Removing Stains on Wood Furniture
Removing Water Rings from Wood Furniture
Wood furniture takes special care. That’s why so many of us use covers and coasters and take other means to protect our wood pieces. When accidents do happen, a white water stain or ring is left behind. This doesn’t have to be the end of your furniture, however. There are steps you can take to rectify the damage, and hopefully, save your wooden piece from the dumpster.
1. Gentle buffing is the key for fresh white water marks. As soon as you see the mark appear, try rubbing gently until the stain disappears. It’s important to act quickly so the water doesn’t have much time to penetrate the wood. In many cases, buffing with a clean, dry cloth, and a little patience, is all that’s needed to remove a water stain. If the stain is set in, you can try polishing with an oil based wood furniture polish or Restor-A-Finish
and see if that removes the mark. When using any of the methods detailed here, try to use a cloth that won’t leave any lint behind, and when buffing, always go with the grain. Also, if you’re unsure about any of the methods you see here, test first on a hidden area of the table, underneath for example, to make sure no further damage will occur.
2. Toothpaste is supposed to work wonders on water-stain removal. Who knew? Apply a small amount of toothpaste – the white, grainy, non-gel kind, to a damp, clean cloth and gently rub into the water stain. Wipe toothpaste off with a clean, dry cloth and polish as you normally would.
3. You can also try a paste of baking soda and water. Gently rub paste into the stain and leave on for a half-hour or so. Remove the paste with a clean dry cloth and polish with your choice of furniture polish.
4. Another home remedy to try is a paste of salt and cooking oil. Rub this paste into the stain and wait about fifteen or twenty minutes. After that amount of time, wipe off the paste with a clean, dry cloth and polish as usual.
5. Apply a coat of mayonnaise over the stain and let sit over night. The next morning, wipe off with a clean, dry cloth and polish with your favorite furniture polish. Some suggest using wood ash mixed in with the mayo.
6. Some folks recommend using a hair dryer to dry the stain while it’s still wet. Another suggestion is to rub the stain with cigarette or cigar ashes. Wipe the surface clean and polish as usual.
7. Try Mr. Clean Magic Eraser
sponge. Use it slightly damp and rub the stain out. Wipe the surface clean and polish. If none of these methods work, you may need to consult a professional who can, perhaps, recommend a product, such as oxalic acid (found in Bar Keepers Friend
powdered cleanser), a wood bleach, that will do the trick for you. If the stain has deeply penetrated the wood, you may need to sand and refinish the wood.
Removing Heat & Dark Water Marks on Light Oak
For heat marks or water marks on wood furniture, mix some wood ashes with mayonnaise and rub the glop into the stain with a soft cloth. You may have to use more than one application. You may need to apply heat with a blow dryer or hot iron (without steam) held above the wood to open the pores of the wood. One of the great Master Craftsman of Grand Rapids, Michigan Furniture making fame - used this same formula for working "magic" on many priceless pieces of furniture that passed through his hands. He never once had a complaint, and as many have already observed, it's such an "easy fix". Grandpa said it's because of the fats in the oil - and the wood still was porous and would drink in the oil once it was broken down with heat. For bleaching treatment of an older dark stain, carefully apply Bar Keepers Friend
powder cleanser exactly on the stain with a spoon and then crushed it down onto the stain with the back of the spoon. Use an eyedropper to wet the cleanser with water. Wait one hour and the stain should be gone.
*************
Debbie's Tips on Distressing Wood Furniture
To distress a piece, there are lots of things you can use to give it that well-worn look. You can: 1 - take a small nail and put 2-5 small pits or holes close together in 3 to 5 areas where wear would most likely occur; 2 - sand areas where wear would occur 3 - use steel wool to lightly rub off some of the paint on the edges where wear would normally occur; 4 - before painting it, use drops of candle wax or a smear of candle wax where you want no paint to adhere to the wood (Once you spray paint it remove the wax and use steel wool on the edges to rough up and transition the area); 5 - use brown or back wax or shoe polish to simulate stain or dirt that has been worked into the wood over time. 6 - hit it with a chain
Be creative with your distressing tools, just be careful with the wood!
**********
Thanks to Debbie, my corner table turned out awesome! Check out my blog post on its progress and completion!
I Want This is going to be a new "segment" of my blog with no purpose other than showing things I've found that I want!!! For some of these items, I may end up breaking down and buying them, but most of these are just dreams........
The Etsy store is "Hammermann" and they have beautiful spoons and and other items.
This is an Antique Spoon Garden Marker. Here are others:
********
While sitting in a doctor's office waiting room the other day, I was perusing through a Better Homes and Gardens magazine. I ran across an article about succulents and a garden shop in Santa Cruz, CA called DIG that creates amazing planters with succulents. Here are some of my favorites.
This is a concrete top table that was broken in half and has steel legs. Pebbles were glued in to keep in soil, and succulents were planted to create an amazing planted strip in this table.
These are orbs that start with sphagnum moss and have succulents planted around the moss. This is an amazing living decoration.
This is a beautiful living picture of succulents in a frame. Learn how to make this frame here!
********
The last site led me in the direction of living walls... may sound kind of weird, but these things are amazing. I want a house covered in them. It makes it look like you live in a jungle. Most of my browsing was done on Urban Zeal's site and Living Walls and Vertical Gardens' site.
These are outdoor living walls.
I am obsessed with this one. I love the pattern and the colors!
There are also indoor living walls. Some are used for purely aesthetic reasons and others serve more of a practical purpose.
These two living walls are used in the kitchen area to grow vegetables and herbs.
I recently found out about this absolutely amazing and creative artist. Her site is this go-round's Funky Site! I am blown away by her work, and I am so incredibly jealous and inspired and intrigued. I am totally smitten! The artist's name is Erika Iris Simmons. Through her site you can get to her flickr account and her blog. Check her out.........
This is from her "Ghost in the Machine" collection where she uses cassette tapes to create portraits (Jimi Hendrix pictured).
Here she uses strips of paper from Oscar Wilde's book "The Picture of Dorian Gray" to create his portrait.
This is a portrait of Beethoven made out of his own sheet music.
Here she uses the "guts" of a baseball and it looks amazing.
**********
There is beautiful flow and movement in her art. She uses everyday found objects and creates amazing pieces out of them. She is an incredible artist and I'm in total awe of her!
Sometime in mid-June this year it was raining and all of a sudden the rain sounded really loud. We opened our porch door and hail was flying down at about a 45 degree angle. Here are a couple pictures of the hail.
This is hail at the bottom of my elephant ear plant, which got pelted by the hail! Each leaf had 5-10 holes in it from the hail - they flew clean through them like bullets and left clean circular holes.




 ,
,  , wax, shellac, lacquer, etc? It seems to have some stains on it... are they old water stains or burns? Are there lots of nicks and scrapes on the top or the legs? Does the drawer slide well? Is it dovetailed or just nailed together? Is the top attached to the base firmly? Are the legs loose? How is it built underneath?
  or very mild (Ivory) liquid soap and a soft t-shirt cloth. Then you can see what was dirt and what is a stain or abrasion. If you can describe the coating on the piece then you can figure out how to get it off so that you can either stain or paint it. Old paint or coating either needs to come off or significantly roughed up before you can do anything.
  and an
  for the top and sides. Just use your hand and strips of sandpaper that make it all the way around the legs.
 or
or  and see if that removes the mark. When using any of the methods detailed here, try to use a cloth that won’t leave any lint behind, and when buffing, always go with the grain. Also, if you’re unsure about any of the methods you see here, test first on a hidden area of the table, underneath for example, to make sure no further damage will occur.
 sponge. Use it slightly damp and rub the stain out. Wipe the surface clean and polish.
  powdered cleanser), a wood bleach, that will do the trick for you. If the stain has deeply penetrated the wood, you may need to sand and refinish the wood.


