Despite my cheeky post title, I am not crazy, or off my rocker :) I did, however spend this past weekend reupholstering a rocking chair that I got for my new studio apartment and I am pleased to share the amazing outcome!! Maybe to some spending my weekend reupholstering is a little nuts, but I'm alright with that!
So here's the rocking chair how I bought it - $25 on sale at a local antique market. I wasn't sure why it was $25 and was nervous that there was something really wrong with it. The man said he sat in it everyday while working there and there's nothing wrong, the seller just wanted to move her product and clear out her booth so she put it on a great sale. And I reaped all the benefits!! :) I made sure to check it out well in the store before buying it though, making sure there weren't any obvious issues with the frame. As long as a piece has good bones you can do so much with it!
It has great curves, and it was really in great condition.
I knew that I wanted to stain the wood, because I am more a dark wood fan than a lighter wood. Plus for the fabric I had in mind, I knew a darker stain would look best. So I began lightly sanding down the wood and re-staining it this darker
Minwax "Kona" shade. Here's the comparison of colors!
As tempting as it was to keep the beautiful, orange crushed velvet fabric on ;) I decided to change it. So I started yanking it off, which entailed the removal of many an upholstery tack! The seat of the chair has real cotton batting (not the cotton/polyester blends of today), and a plain cotton fabric holding the batting in place.
The back of the chair revealed the fabric used before the orange crushed velvet....
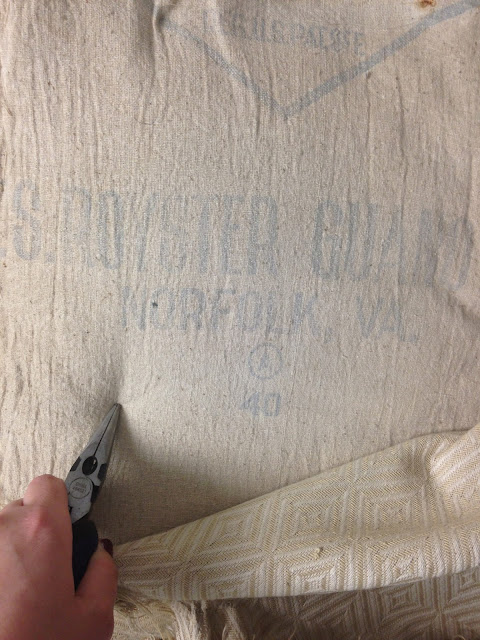
Removing one more layer revealed yet another layer of the original fabric, stained by years of use! Both of these fabrics were very heavy duty and quite beautiful for the time.
Removing the cotton batting revealed the burlap webbing creating the chair's structure and, what's that you ask?! An old bath mat to bolster the sides of the seat?? Oh yes. An old bath mat.... The orange velvet reupholstery job was clearly a "home job", not like MY home jobs, done with care and attention, but a creepy home job that included filling spaces with the closest things one could find - their pink bath mat... I hoped there was at least a wad of cash in there stowed away in granny's rocker, but alas, nothing. Just a gross old bath mat. Needless to say, I kept that... Juuuust kidding.. I trashed that thing quick, fast and in a hurry!!
Here's all the original cotton batting (plus a free advertisement for
Home Goods in the background ;) ). It may look kind of gross, and I actually removed some of the stained areas, but it is actually great batting and is all real cotton. You can see pieces of the cotton plant in it and it's still in great condition in terms of comfort.
Now it's time for tack removal. This chair was loaded with three upholstery jobs of tacks, which needed to be removed before reupholstering. So a good set of pliers assisted in this job.
Proof that I did not keep those beautiful bath mats but instead used new
cotton batting from
Hobby Lobby, (which is great with their 40% off coupon!) to bolster the side of the seat. Also a close up of that beautiful, newly stained wood! :)
I fitted new batting over the old batting to give even more cushion to the chair, because as nice as the old batting was still, it begins to lose its cushion after a while.
Now it was time for cutting the fabric to size. Here's me... mis-measuring and almost messing up the project! AHH!! Just further proof to measure, check, measure check, and do it again, before cutting one's nice, special, limited fabric!! Thank god, I was able to salvage the fabric I had cut and was good to go!
Laying the fabric over the chair for a final fitting. Make sure to have at least 2 inches extra on either side (looks like more here because somebody mis-measured!) for some give while stapling/tacking to the base. The most important thing about this step is to make sure the lines are even and the pattern is matched up.
The seat fabric and the seat back fabric pulled through to the other side and got stapled onto the wood in the back.
Then the back was completed and stapled over those pieces and all the way on to the bottom board.
My newly upholstered rocking chair!!!!! BEAUTIFUL!!!!! All I have to finish now are the upholstery tacks, which just pull the whole look together. I have to do those a little bit at a time so as to not piss off my neighbors too badly with my incessant hammering :)
Rocking chair in its new home next to my other reupholstered chair! I love the blue and creams together!
Looks like such a great, worldly rocking chair! I was going for the pueblo abuela's rocking chair look, and I think I accomplished that!!
Let me know what you think!!!


.JPG)
.JPG)
.JPG)
.JPG)
.JPG)
.JPG)
.JPG)
.JPG)
.JPG)
.JPG)
.JPG)
.JPG)
.JPG)
.JPG)
.JPG)
.JPG)


